期中考试 用Kotlin实现图片处理程序
你好,我是朱涛。不知不觉间,咱们的课程就已经进行一半了,我们已经学完很多内容:
- 基础篇,我们学完了所有Kotlin基础语法和重要特性。
- 加餐篇,我们学习了Kotlin编程的5大编程思维:函数式思维、表达式思维、不变性思维、空安全思维、协程思维。
- 协程篇,我们也已经学完了所有基础的协程概念。
所以现在,是时候来一次阶段性的验收了。这次,我们一起来做一个图片处理程序,来考察一下自己对于Kotlin编程知识的理解和应用掌握情况。初始化工程的代码在这里GitHub,你可以像往常那样,将其clone下来,然后用IntelliJ打开即可。
我们仍然会分为两个版本1.0、2.0,不过,这一次要轮到你亲自动手写代码了!
1.0版本:处理本地图片
当你将初始化工程打开以后,你会发现“src/main/resources/images/”这个目录下有一张图片:android.png,它就是我们要处理的图片对象。
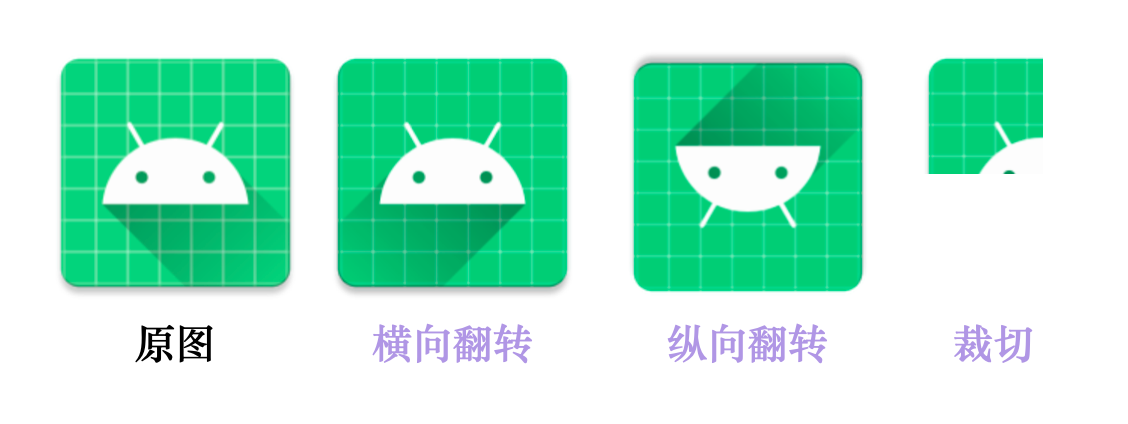
一般来说,我们想要处理图片,会第一时间想到Photoshop,但其实简单的图片处理任务,我们完全可以通过代码来实现,比如图片横向翻转、图片纵向翻转、图片裁切。
关于图片的底层定义,Java SDK已经提供了很好的支持,我们在Kotlin代码当中可以直接使用相关的类。为了防止你对JDK不熟悉,我在初始化工程当中,已经为你做好了前期准备工作:
class Image(private val pixels: Array<Array<Color>>) {

fun height(): Int {
return pixels.size
}

fun width(): Int {
return pixels[0].size
}

/**
* 底层不处理越界
*/
fun getPixel(y: Int, x: Int): Color {
return pixels[y][x]
}
}
这是我定义的一个Image类,它的作用就是封装图片的内存对象。我们都知道,图片的本质是一堆像素点(Pixel),而每个像素点,都可以用RGB来表示,这里我们用Java SDK当中的Color来表示。
当我们把图片放大到足够倍数的时候,我们就可以看到其中的正方形像素点了。
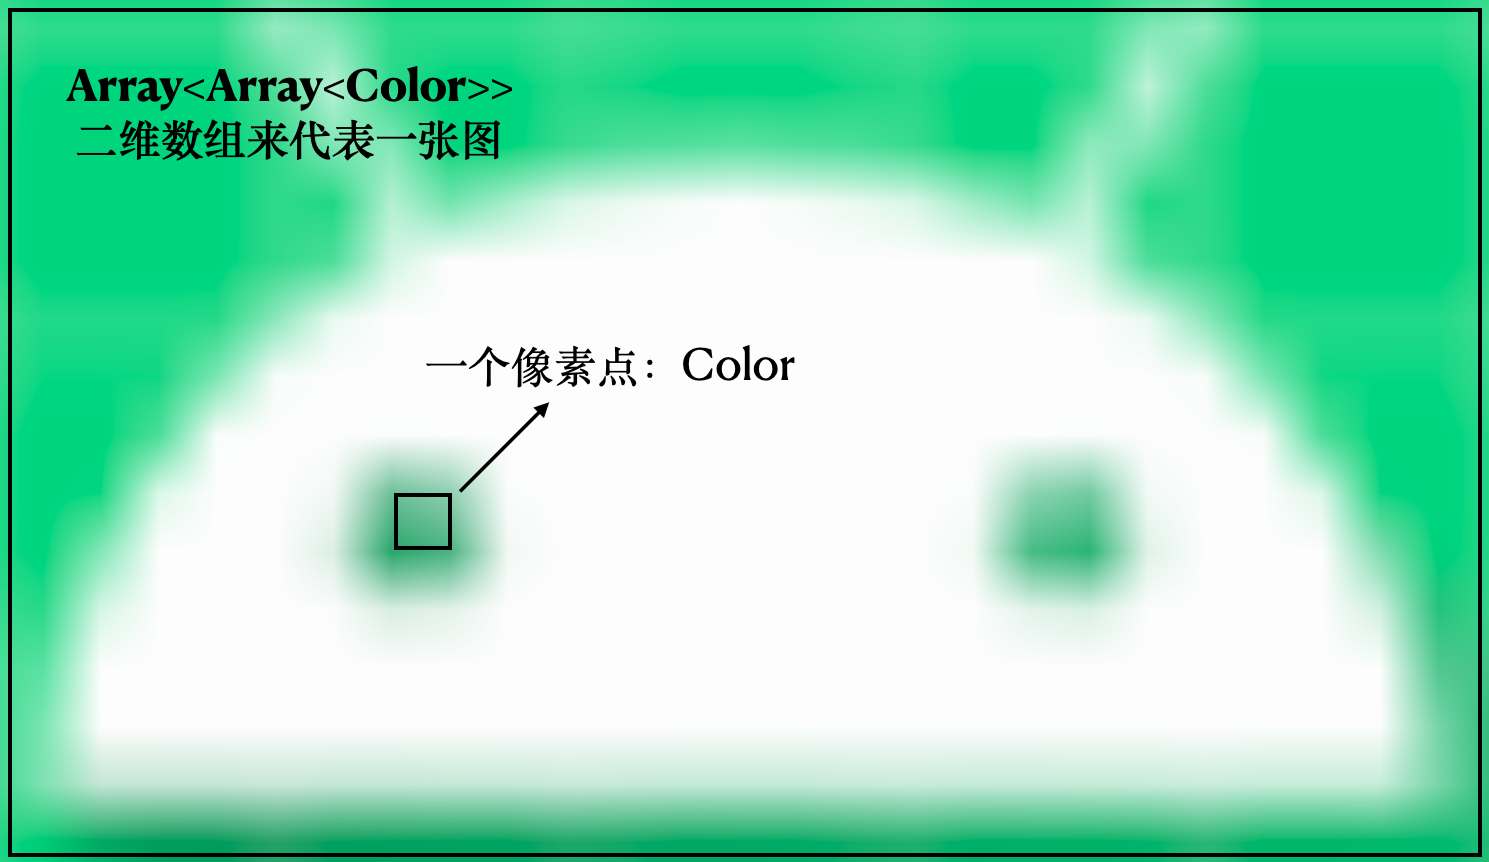
所以,最终我们就可以用“Array<Array<Color>>”这样一个二维数组来表示一张图片。
另外,从本地加载图片到内存的代码,我也帮你写好了:
const val BASE_PATH = "./src/main/resources/images/"

fun main() {
val image = loadImage(File("${BASE_PATH}android.png"))
println("Width = ${image.width()};Height = ${image.height()}")
}

/**
* 加载本地图片到内存中
*/
fun loadImage(imageFile: File) =
ImageIO.read(imageFile)
.let {
Array(it.height) { y ->
Array(it.width) { x ->
Color(it.getRGB(x, y))
}
}
}.let {
Image(it)
}
那么,唯一需要你做的,就是实现这几个函数的功能:图片横向翻转、图片纵向翻转、图片裁切。
/**
* 横向翻转图片
* 待实现
*/
fun Image.flipHorizontal(): Image = TODO()

/**
* 纵向翻转图片
* 待实现
*/
fun Image.flipVertical(): Image = TODO()

/**
* 图片裁切
* 待实现
*/
fun Image.crop(startY: Int, startX: Int, width: Int, height: Int): Image = TODO()
另外,如果你有兴趣的话,还可以去实现对应的单元测试代码:
class TestImageProcessor {

/**
* 待实现的单元测试
*/
@Test
fun testFlipHorizontal() {

}

/**
* 待实现的单元测试
*/
@Test
fun testFlipVertical() {

}

/**
* 待实现的单元测试
*/
@Test
fun testCrop() {

}
}
这样一来,我们1.0版本的代码就算完成了。不过,我们还没用上协程的知识啊!
请看2.0版本。
2.0版本:增加图片下载功能
在上个版本中,我们的代码仅支持本地图片的处理,但有的时候,我们想要处理网络上的图片该怎么办呢?所以这时候,我们可以增加一个下载网络图片的功能。
这个版本,你只需要实现一个函数:
/**
* 挂起函数,以http的方式下载图片,保存到本地
* 待实现
*/
suspend fun downloadImage(url: String, outputFile: File): Boolean = TODO()
需要注意的是,由于下载网络图片比较耗时,我们需要将其定义成一个挂起函数,这样一来,我们后续在使用它的时候就可以更得心应手了。
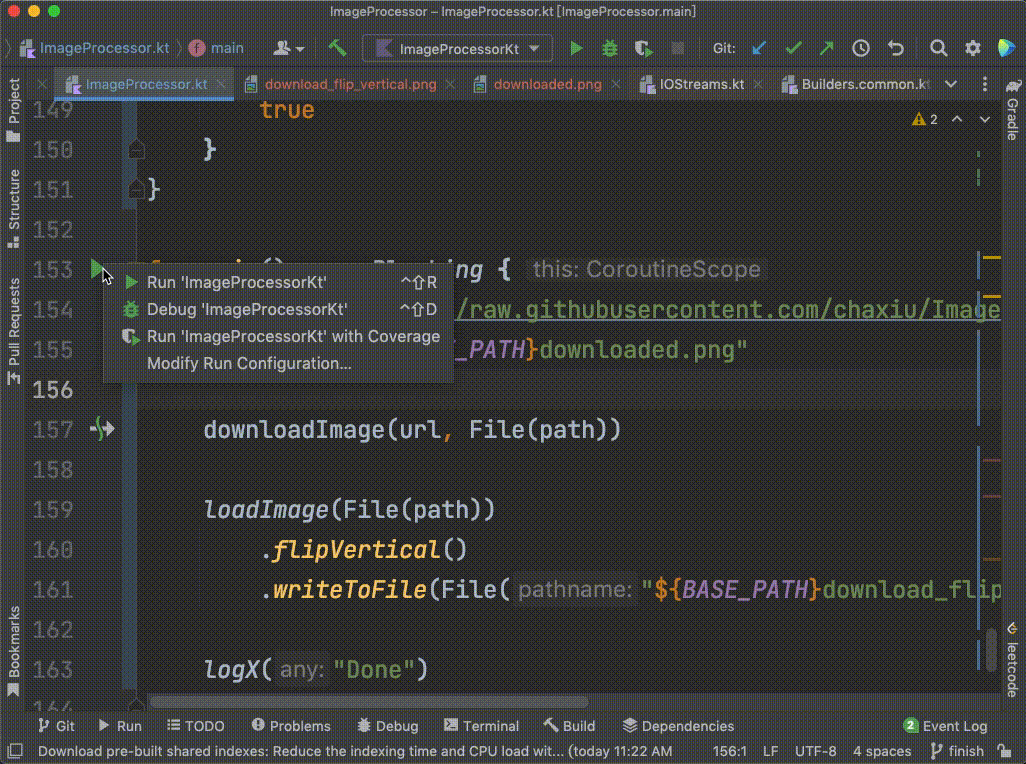
fun main() = runBlocking {
// 不一定非要下载我提供的链接
val url = "https://raw.githubusercontent.com/chaxiu/ImageProcessor/main/src/main/resources/images/android.png"
val path = "${BASE_PATH}downloaded.png"

// 调用挂起函数
downloadImage(url, File(path))

val image = loadImage(File(path))
println("Width = ${image.width()};Height = ${image.height()}")
}
在上面的代码中,我是以“https://raw.githubusercontent.com/chaxiu/ImageProcessor/main/src/main/resources/images/android.png” 这个链接为例,这是一个HTTPS的链接,你在实际开发的时候,也可以随便去找一个普通的HTTP图片链接,这样就不必处理SSL的问题了。
程序实际运行效果会是这样的:
在下节课里,我会给出我的代码参考,不过在看我的代码之前,记得先要自己动手啊。
其实,以我们这个工程为基础,再加上一些图形学算法,我们完全可以做出Photoshop当中的一些高级功能,比如图片缩放、图片参数调节、图片滤镜、抠像,甚至图片识别,等等。如果你本身就有图形学方面的知识储备,也欢迎你在此基础上实现更复杂的功能!
好了,我们下节课再见!
- 曾帅 👍(4) 💬(1)
git clone 之后,打开编译就报错,MultipleCompilationErrorsException 。把 gradle/wrapper/gradle-wrapper.properties 里面的 7.1 版本改成 7.2 之后重新编译就可以了。 有同样问题的同学可以参考一下。
2022-03-01 - better 👍(3) 💬(1)
// Image 添加方法,同时 去掉 pixels 的 private fun getHorArray(x: Int): Array<Color> { return pixels[x] } //// fun Image.flipHorizontal(): Image { for (i in (0 until this.height())) { this.getHorArray(i).reverse() } return this } fun Image.flipVertical(): Image { this.pixels.reverse() return this } fun Image.crop(startY: Int, startX: Int, width: Int, height: Int): Image { return Array(width - startY) { y -> Array(height - startX) { x -> Color(this.getPixel(x, y).rgb) } }.let { Image(it) } }
2022-02-27 - 白乾涛 👍(1) 💬(1)
fun main() = runBlocking { File(BASE_PATH).mkdirs() downloadFile(URL, getPathFile("origin")) .loadImage() .also { it.flipVertical().writeToFile(getPathFile("vertical")) } .also { it.flipHorizontal().writeToFile(getPathFile("horizontal")) } .also { it.crop(0, 0, 100, 50).writeToFile(getPathFile("crop")) } delay(10L) }
2022-03-06 - A Lonely Cat 👍(1) 💬(1)
图片下载功能 private val client = OkHttpClient.Builder() .build() /** * 挂起函数,以http的方式下载图片,保存到本地 */ suspend fun downloadImage(url: String, outputFile: File): Boolean = suspendCoroutine { con -> val request = Request.Builder() .url(url) .get() .build() client.newCall(request) .enqueue(object : Callback { override fun onFailure(call: Call, e: IOException) { e.printStackTrace() con.resume(false) } override fun onResponse(call: Call, response: Response) { if (response.isSuccessful) { response.body?.bytes()?.let { outputFile.writeBytes(it) } con.resume(true) } else { con.resume(false) } } }) } fun main() = runBlocking { val url = "http://img.netbian.com/file/2020/1202/smallaaa773e8cc9729977037e80b19f955891606922519.jpg" val file = File("${BASE_PATH}wallpaper.png") val success = downloadImage(url, file) println("Download file status is success:$success") }
2022-02-25 - Geek_Adr 👍(0) 💬(1)
// 先交作业,后看参考实现 // 图片处理 单测Case 较难实现,偷懒写本地肉眼看 /** * 写到本地,方便可看效果 */ fun Image.writeJPEG(outputFile: File): Boolean = ImageIO.write(BufferedImage(width(), height(), BufferedImage.TYPE_INT_RGB).apply { repeat(height) { y -> repeat(width) { x -> setRGB(x, y, getPixel(y, x).rgb) } } }, "JPEG", outputFile) /** * 图片裁切 */ fun Image.crop(startY: Int, startX: Int, width: Int, height: Int): Image = Array(height) { y -> Array(width) { x -> getPixel(y + startY, x + startX) } }.let { Image(it) } /** * 横向翻转图片 */ fun Image.flipHorizontal(): Image = Array(height()) { y -> Array(width()) { x -> getPixel(y, width() - x - 1) } }.let { Image(it) } /** * 纵向翻转图片 */ fun Image.flipVertical(): Image = Array(height()) { y -> Array(width()) { x -> getPixel(height() - y - 1, x) } }.let { Image(it) } /** * 挂起函数,以http的方式下载图片,保存到本地 */ suspend fun downloadImage(url: String, outputFile: File): Boolean = withContext(Dispatchers.IO) { OkHttpClient.Builder().build().run { newCall(Request.Builder().apply { url(url) get() }.build()).execute().run { if (!isSuccessful) { return@run false } return@run body?.byteStream()?.source()?.let { outputFile.sink().buffer().writeAll(it) > 0 } ?: false } } }
2022-03-12 - PoPlus 👍(0) 💬(1)
/** * 挂起函数,以http的方式下载图片,保存到本地 */ suspend fun downloadImage(url: String, outputFile: File) = withContext(Dispatchers.IO) { val client = OkHttpClient() val request = Request.Builder() .url(url) .build() val response = client .newCall(request) .execute() var size = 0L response.body?.byteStream()?.readAllBytes()?.let { bytes -> outputFile.writeBytes(bytes) size = bytes.size.toLong() } if (size == response.headersContentLength()) { return@withContext true } return@withContext false } /** * 主函数 */ fun main() = runBlocking { val url = "https://raw.githubusercontent.com/chaxiu/ImageProcessor/main/src/main/resources/images/android.png" val path = "./download.png" val success = downloadImage(url, File(path)) println(success) val image = loadImage(File(path)) println("Width = ${image.width()};Height = ${image.height()}") } 看到有同学使用 suspendCoroutine 函数处理,不知道和我这个方法比较有什么区别 👀
2022-02-28 - 小江爱学术 👍(0) 💬(0)
当然是要把第一部分和第二部分的内容结合起来啦: 首先自己创建一个获取图片的接口: @GetMapping("/{name}", produces = [MediaType.IMAGE_JPEG_VALUE]) fun picture(@PathVariable name: String): ByteArray { return pictureService.getPicture(name) } 然后用之前的KtCall发请求: @GET("/picture/mountain") fun image(): KtCall<ByteArray> suspend fun downloadImage() = runBlocking { val deferred = async { KtHttpProxy.create(ApiService::class.java) .image() .await() } println("still in progress") return@runBlocking deferred.await() }
2023-01-15 - Michael 👍(0) 💬(0)
使用系统自带的 api 下载文件 suspend fun downloadImage(url: String, outputFile: File): Boolean = withContext(Dispatchers.IO) { kotlin.runCatching { URL(url).openStream().use { outputFile.writeBytes(it.readAllBytes()) } } }.isSuccess
2022-06-29